How To Configure and Connect Old Anviz W1 Pro Device to Crosschex Cloud
Pre-requisites:
1. Crosschex Cloud account. You can register on any of these links: https://eu.crosschexcloud.com/, https://us.crosschexcloud.com/, https://ap.crosschexcloud.com/
2. Anviz W1 Pro that is already connected to the WiFi.
Follow these steps:
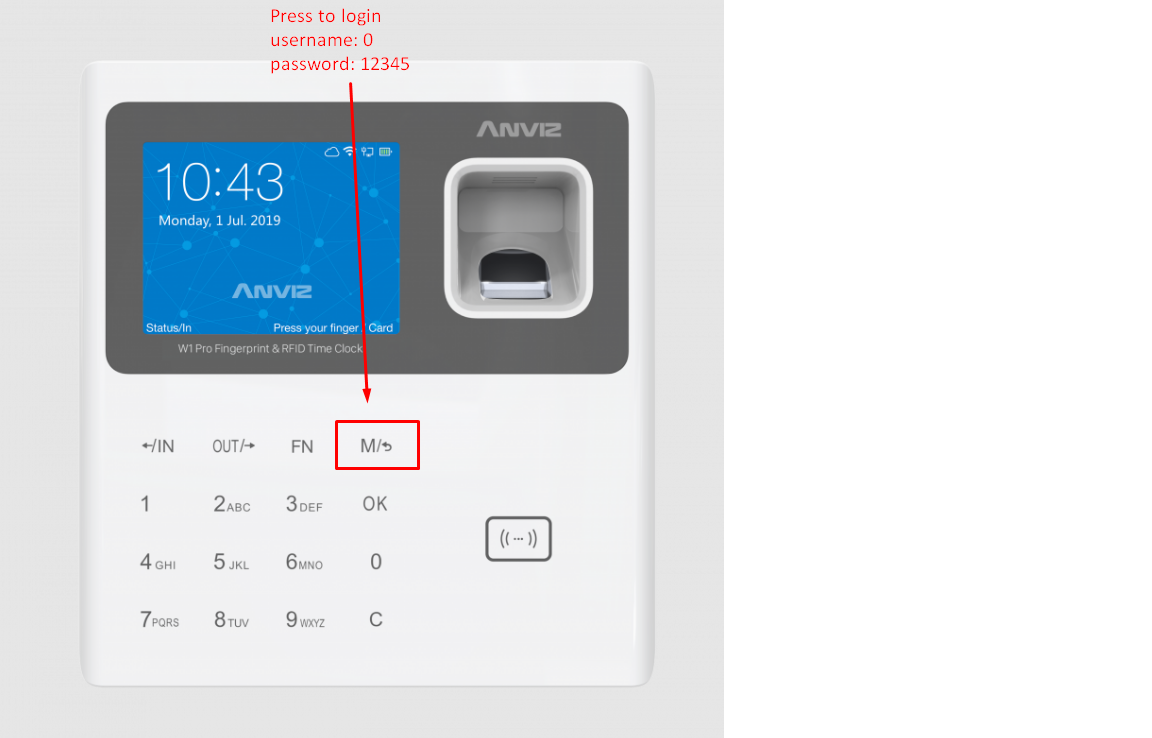
- On your device, login by pressing the “M” key. username: 0 and password: 12345
- Go to Setting -> Basic Info and look for the Firmware. On your computer/laptop/phone, open google chrome browser.
- Search “chatgpt” and enter this prompt: “This is my Anviz W1 Pro Firmware: {your_device_firmware_here}. Which region does it belong to, and what is the correct CrossChex Cloud URL for me to register an account?”. Chatgpt will answer you with either of these three URLs: https://eu.crosschexcloud.com/, https://us.crosschexcloud.com/, https://ap.crosschexcloud.com/. Register an account to the URL given by chatgpt.
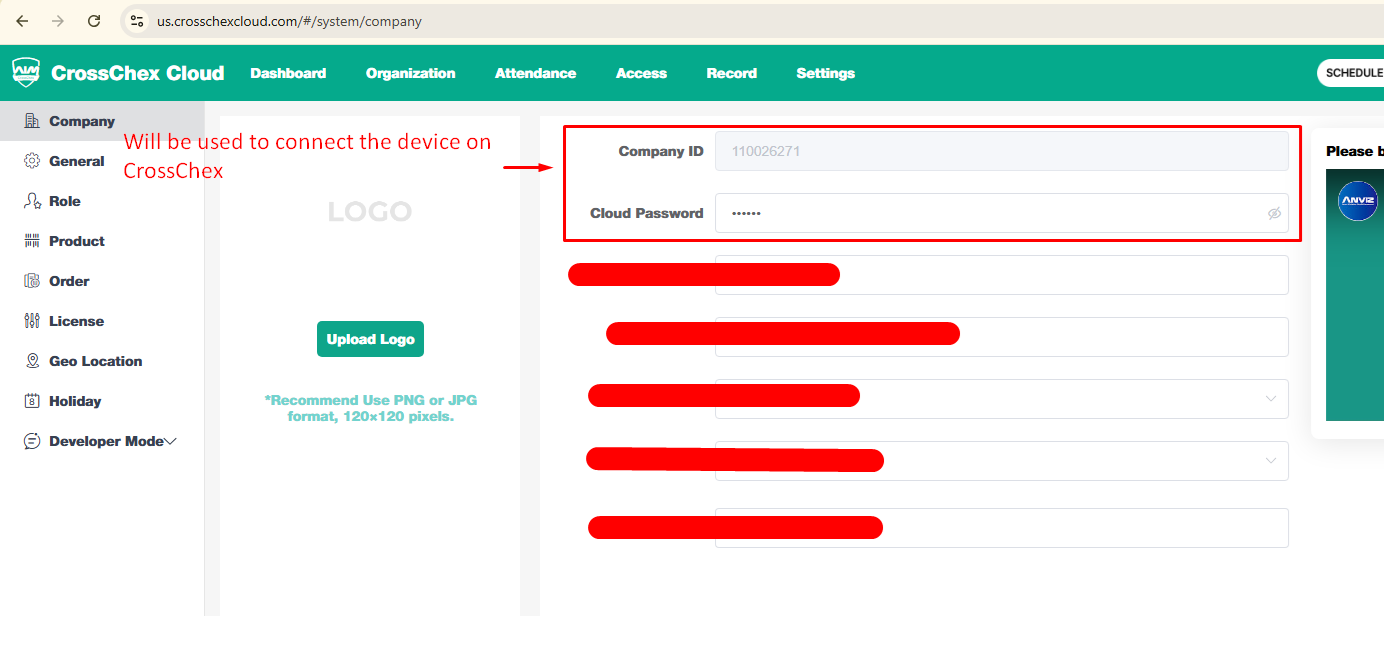
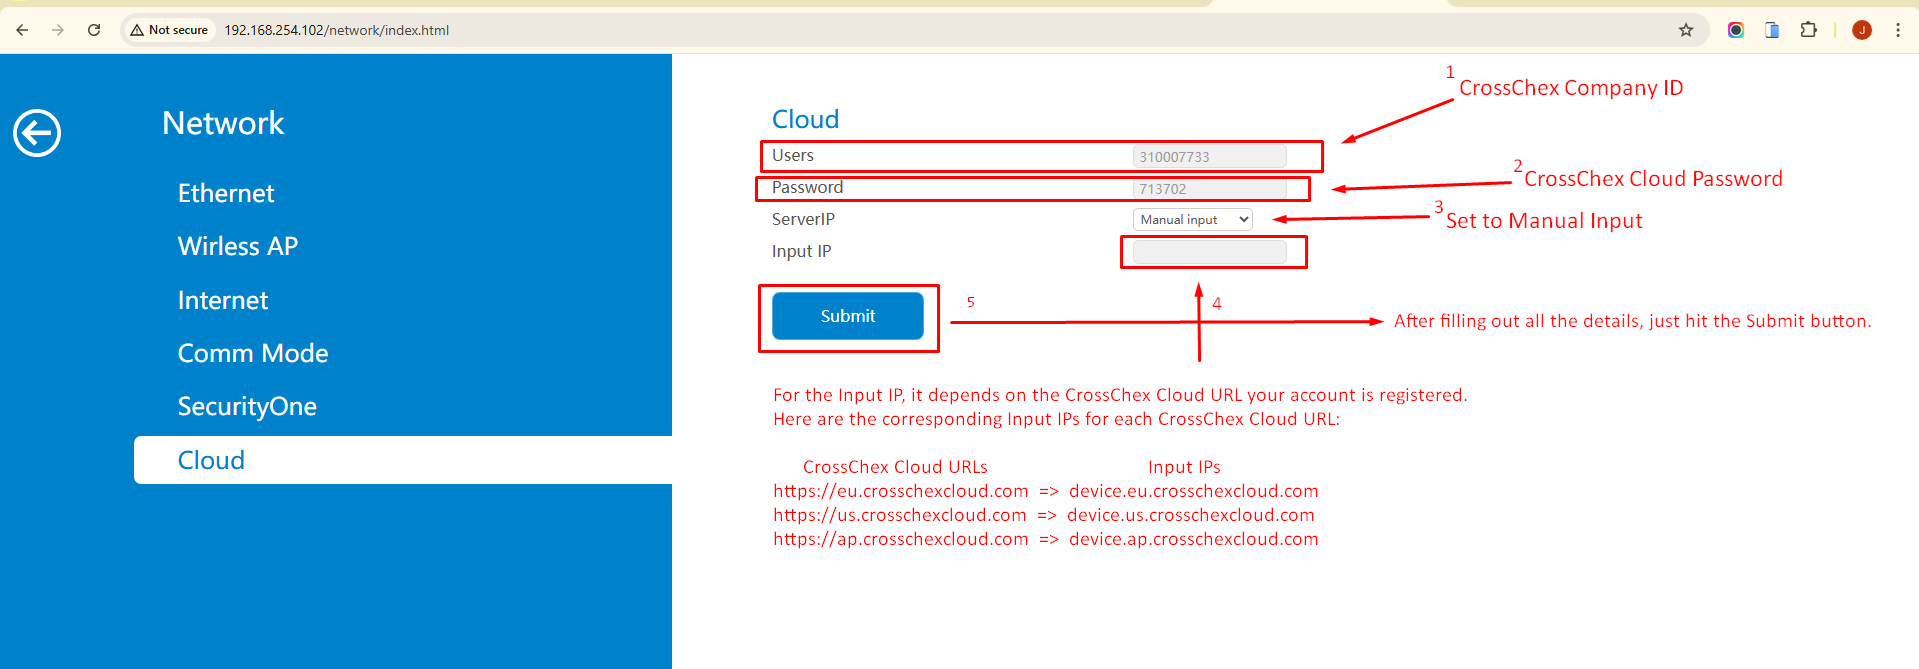
- After registering an account to the correct CrossChex Cloud URL, just login and go to Settings -> Company. Note the Company ID and Cloud Password.
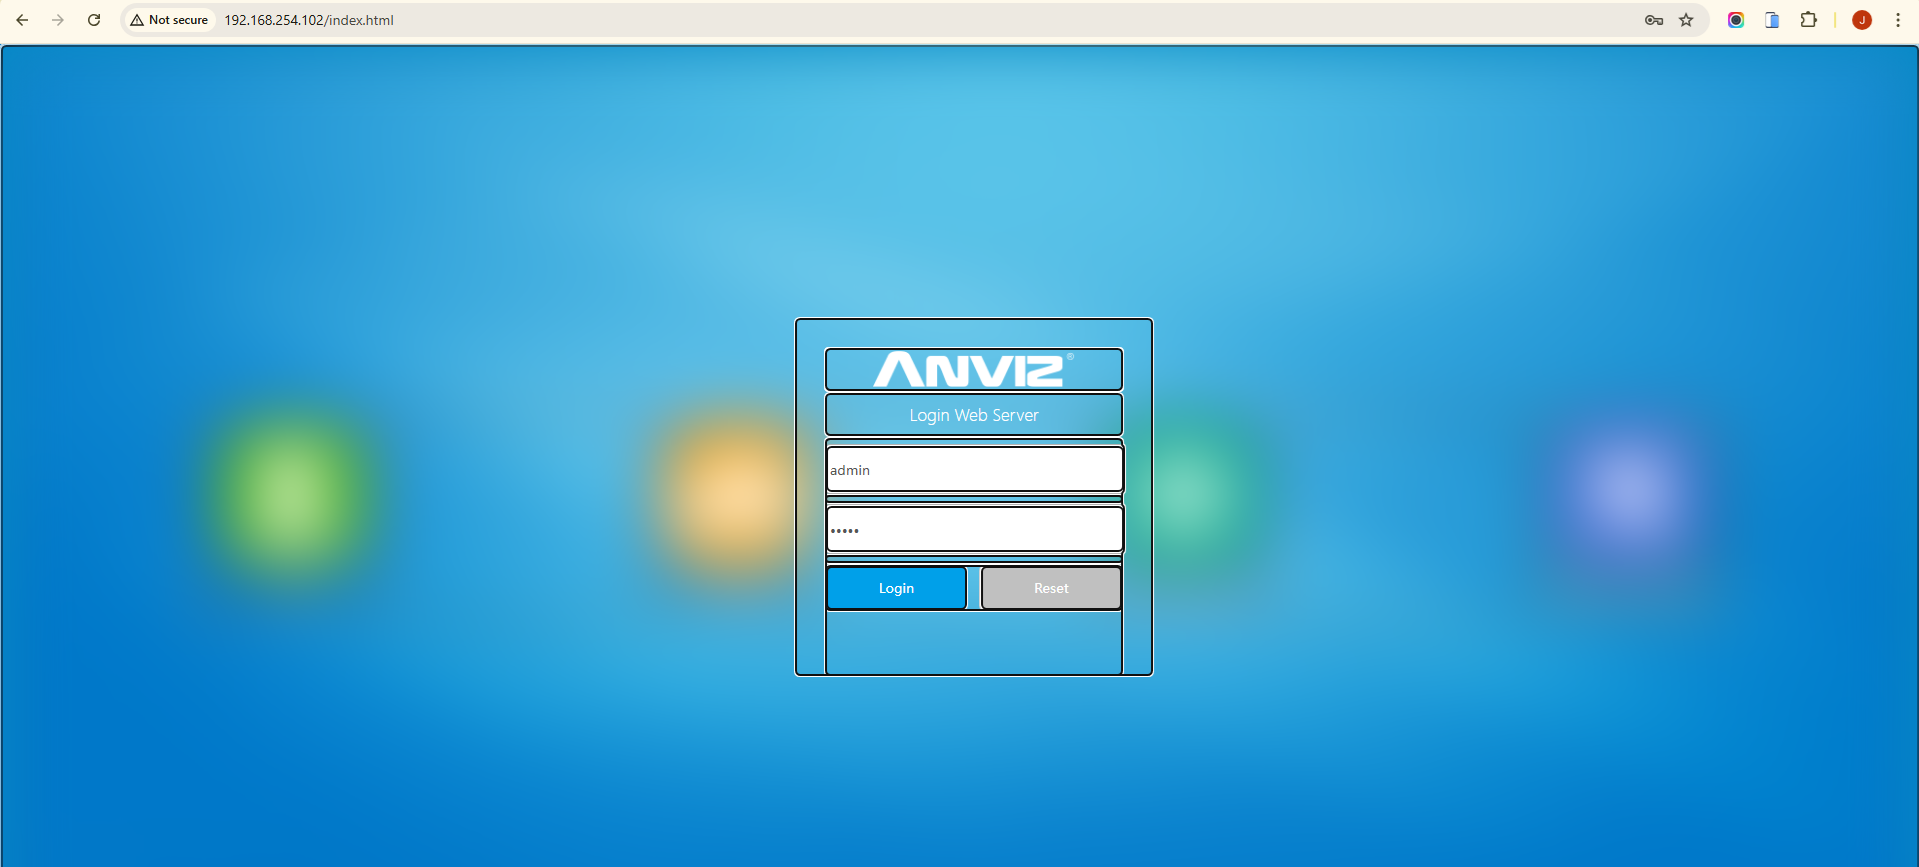
- Going back to your device, go to Network -> WiFi then take note of the Device IP. Looks like this: “192.168.1.202”
- Type the Device IP on your web browser. A login page will appear, just login with these credentials: username: admin and password: 12345
- Go to Network -> Cloud and fill out the details. Here are the corresponding Input IPs for each CrossChex Cloud URLs:
https://eu.crosschexcloud.com/ => device.eu.crosschexcloud.com
https://us.crosschexcloud.com/ => device.us.crosschexcloud.com
https://ap.crosschexcloud.com/ => device.ap.crosschexcloud.com
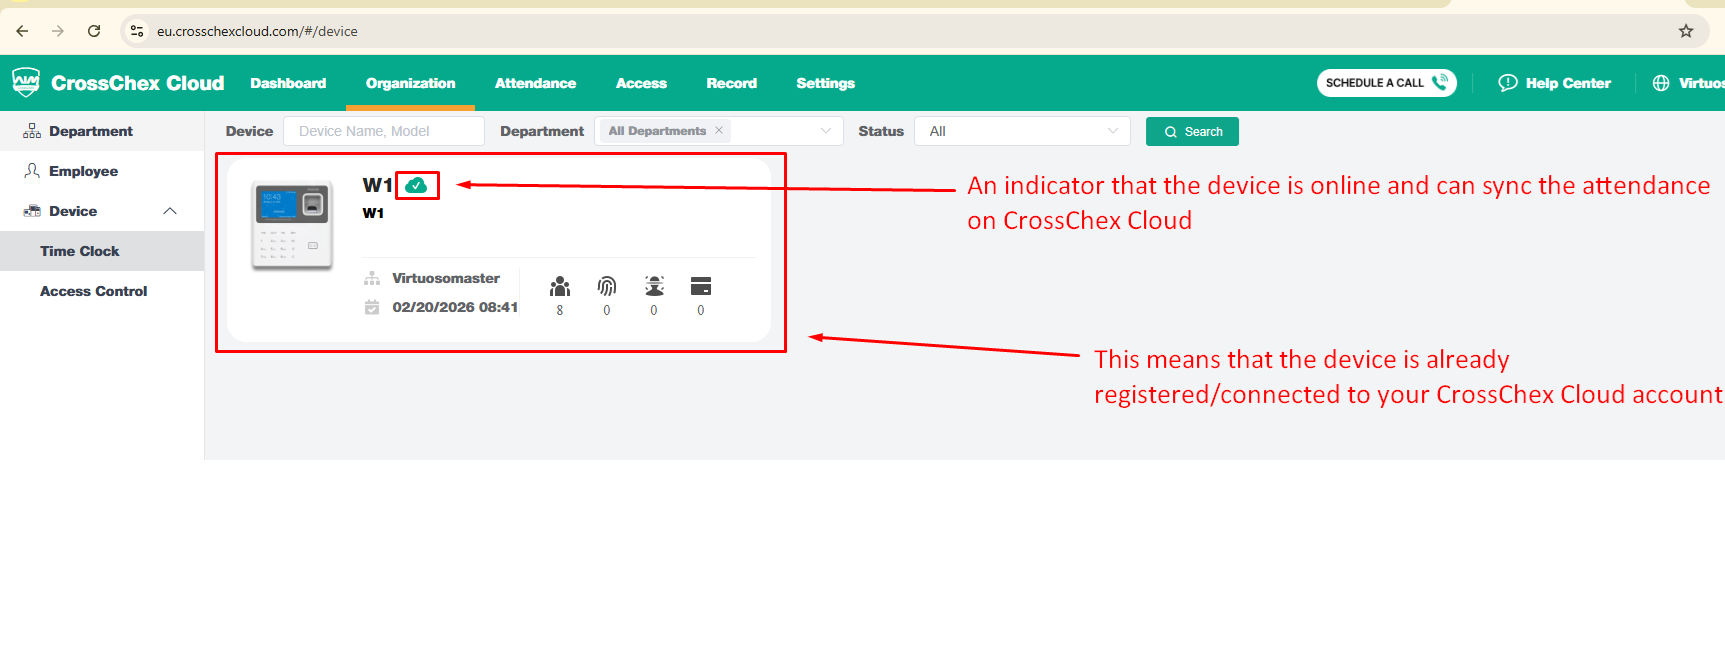
- After submitting the details, it will notify you if the connection was established or not. If the connection was established, you will now see the device on your CrossChex cloud dashboard.